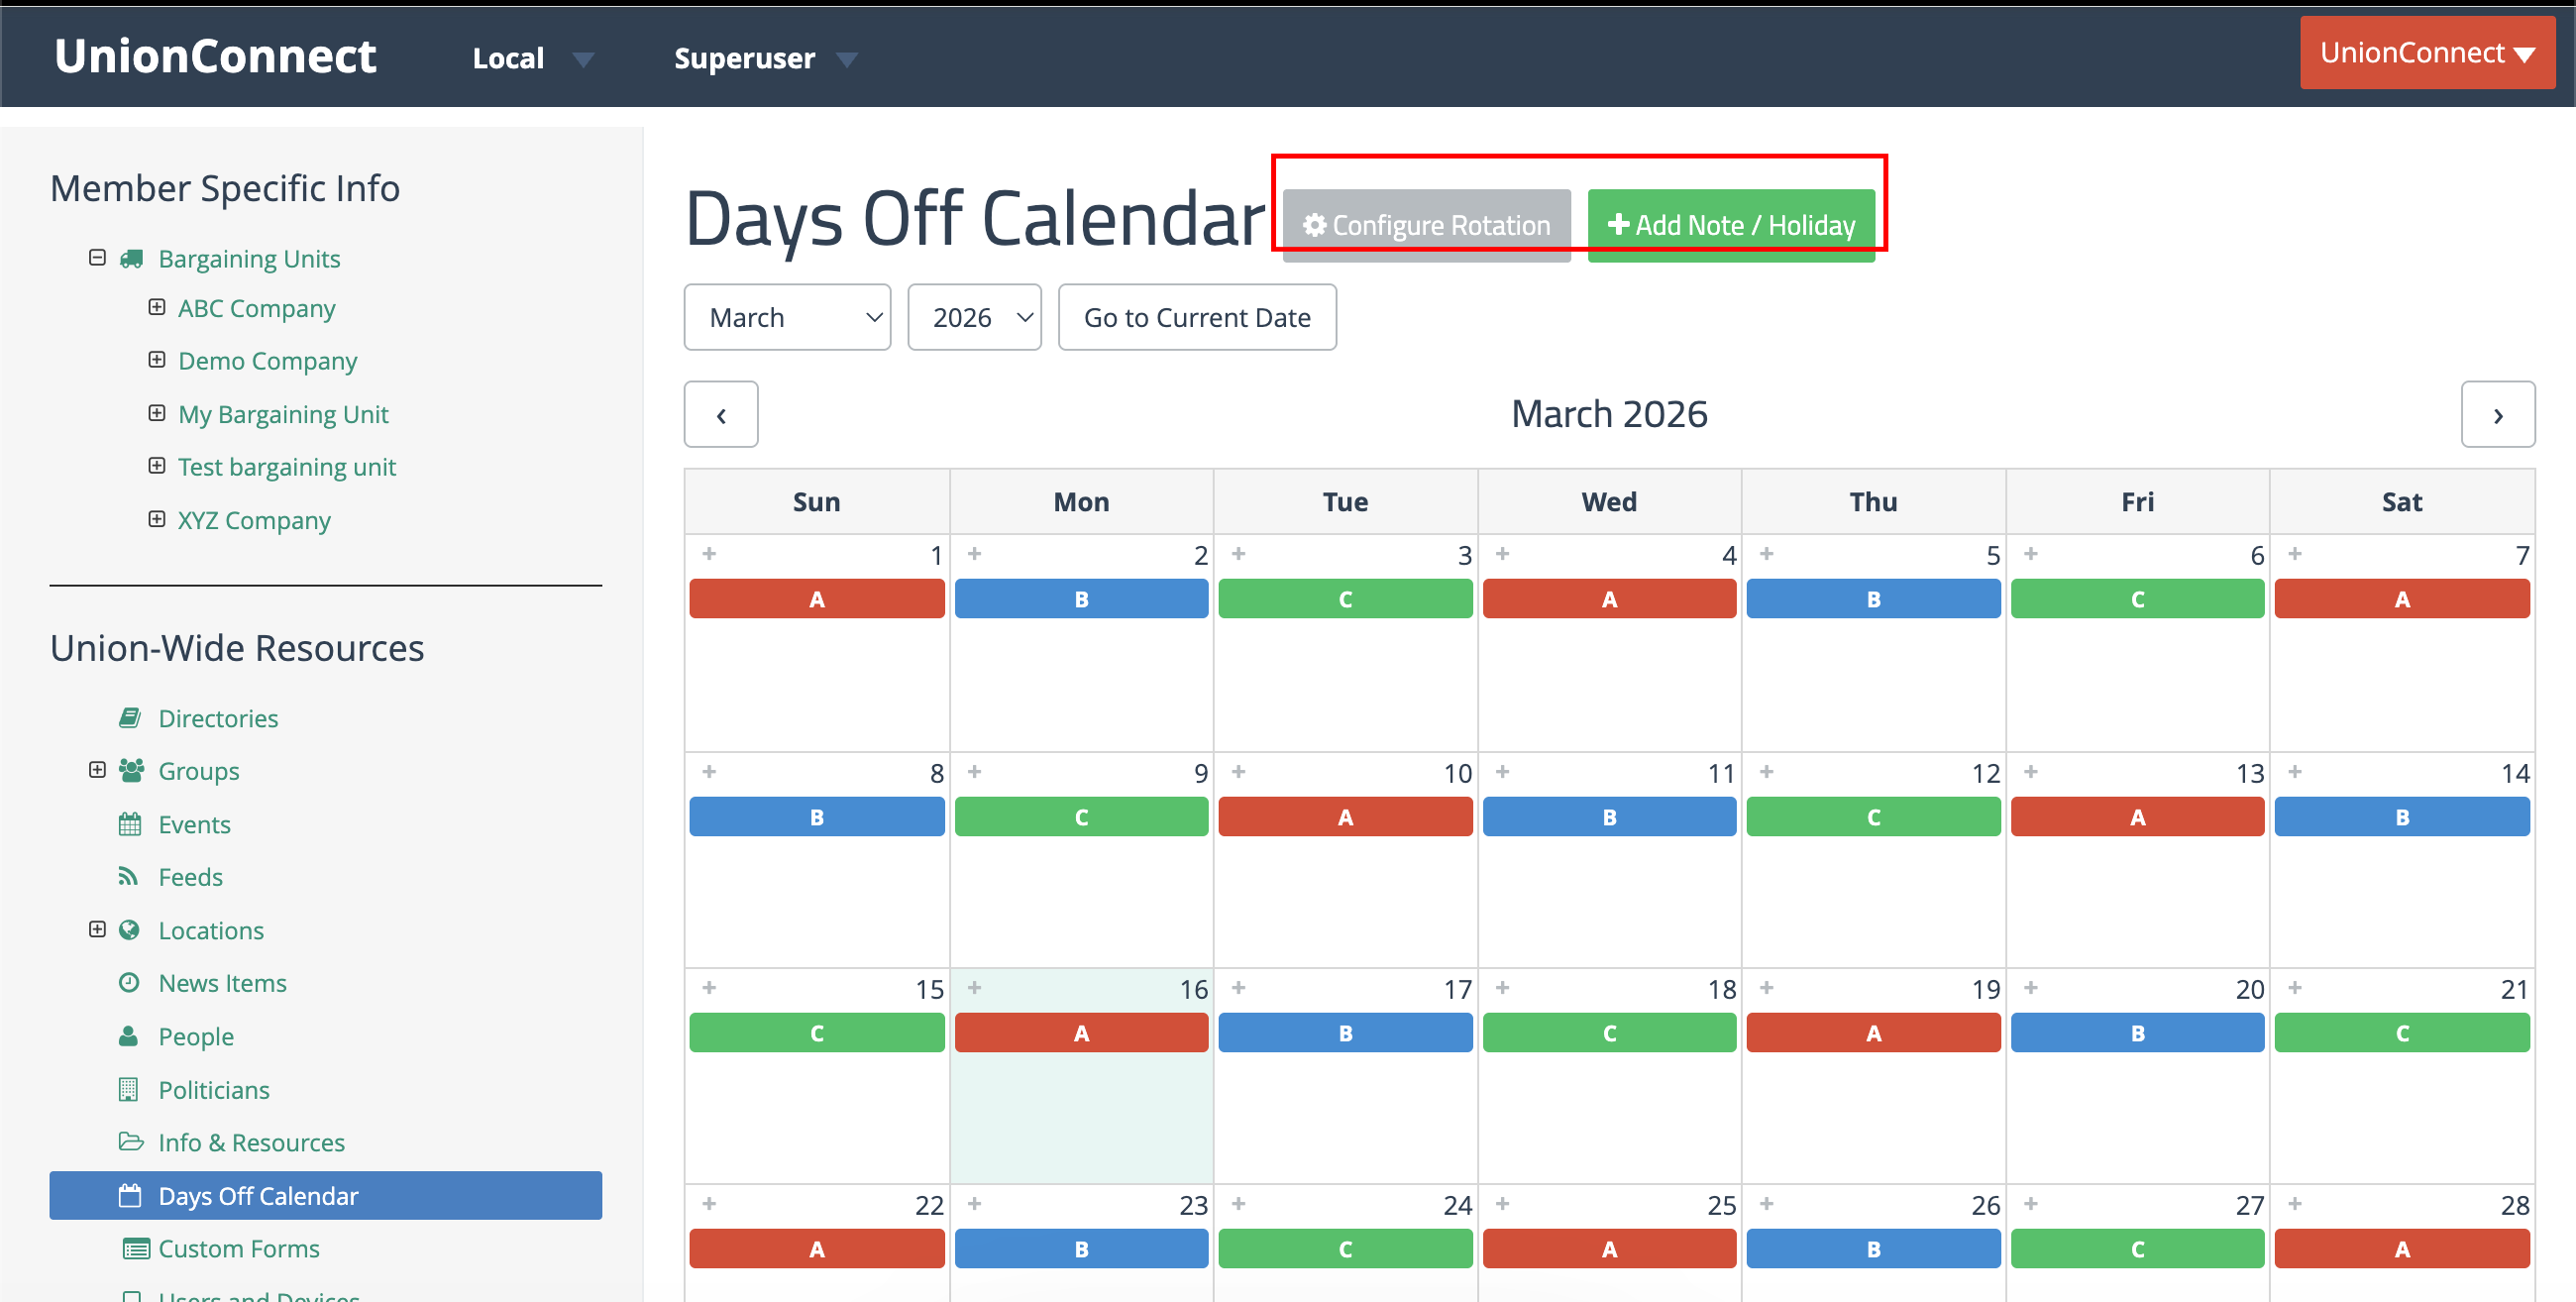
The Days Off Calendar gives your members and administrators a shared calendar view of shift rotations, holidays, and notes. Administrators configure a repeating shift rotation pattern and add calendar entries, while members can view the calendar and track their own days off in the app.
Accessing the Days Off Calendar
- Login to the app manager
- Click Days Off Calendar in the sidebar under Union-Wide Resources
The calendar displays a monthly view with shift rotation letters color-coded by shift, along with any notes and holidays. Use the month and year dropdowns or the navigation arrows to browse different months.
Shift Rotation
The shift rotation defines a repeating pattern of shift letters (such as A, B, C) that cycles continuously on the calendar. Each letter can be assigned its own color for easy visual identification.
Configuring the Rotation
- Click the Configure Rotation button at the top of the calendar
- Set the Cycle Start Date — this is the anchor point from which the pattern repeats forward and backward
- Define the Cycle Pattern by adding days to the cycle:
- Each day has a letter (e.g., A, B, C) and a color selected from the color swatches
- Click + Add Day to Cycle to add more days to the pattern
- Click the × button to remove a day from the cycle
- Check the Preview at the bottom to verify the repeating pattern looks correct
- Click Save Rotation
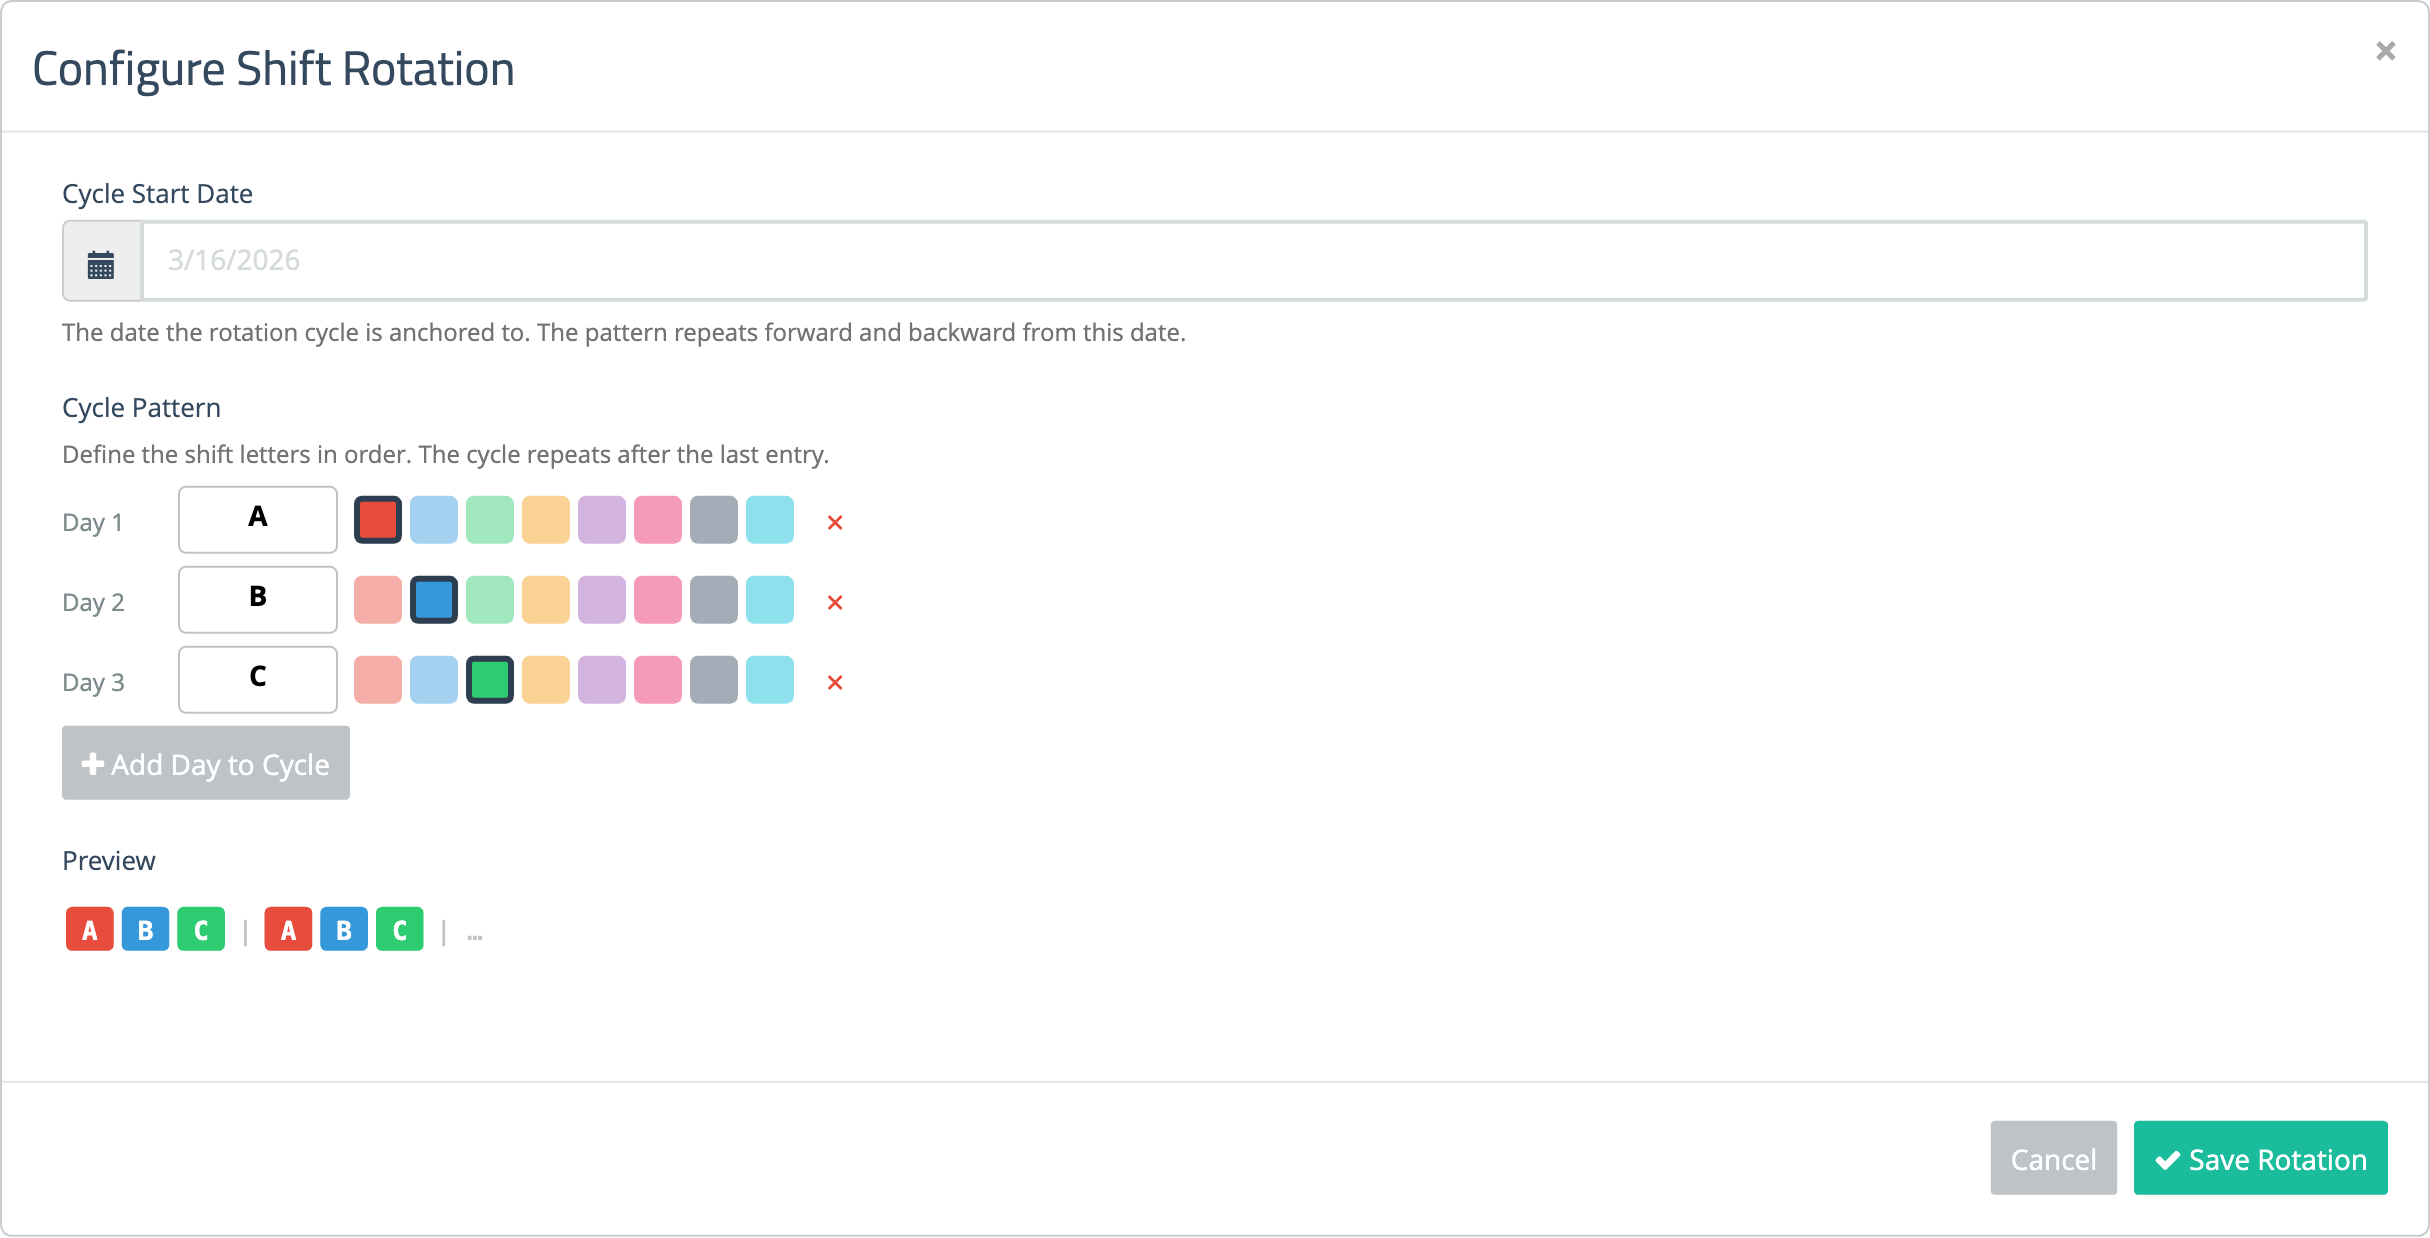
For example, a 3-day rotation of A → B → C will repeat continuously: A, B, C, A, B, C, and so on. The rotation extends both forward and backward from the start date, so all dates on the calendar will show the correct shift letter.
Notes and Holidays
In addition to the shift rotation, you can add individual calendar entries for notes and holidays. These appear on the calendar alongside the rotation letters.
Adding an Entry
- Click + Add Note / Holiday at the top of the calendar, or click the + icon that appears when hovering over a day cell
- Select a Date using the date picker
- Enter a Title for the entry
- Choose the Type:
- Note — displayed in gray on the calendar
- Holiday — displayed in gold and always shown above notes
- Click Save Entry
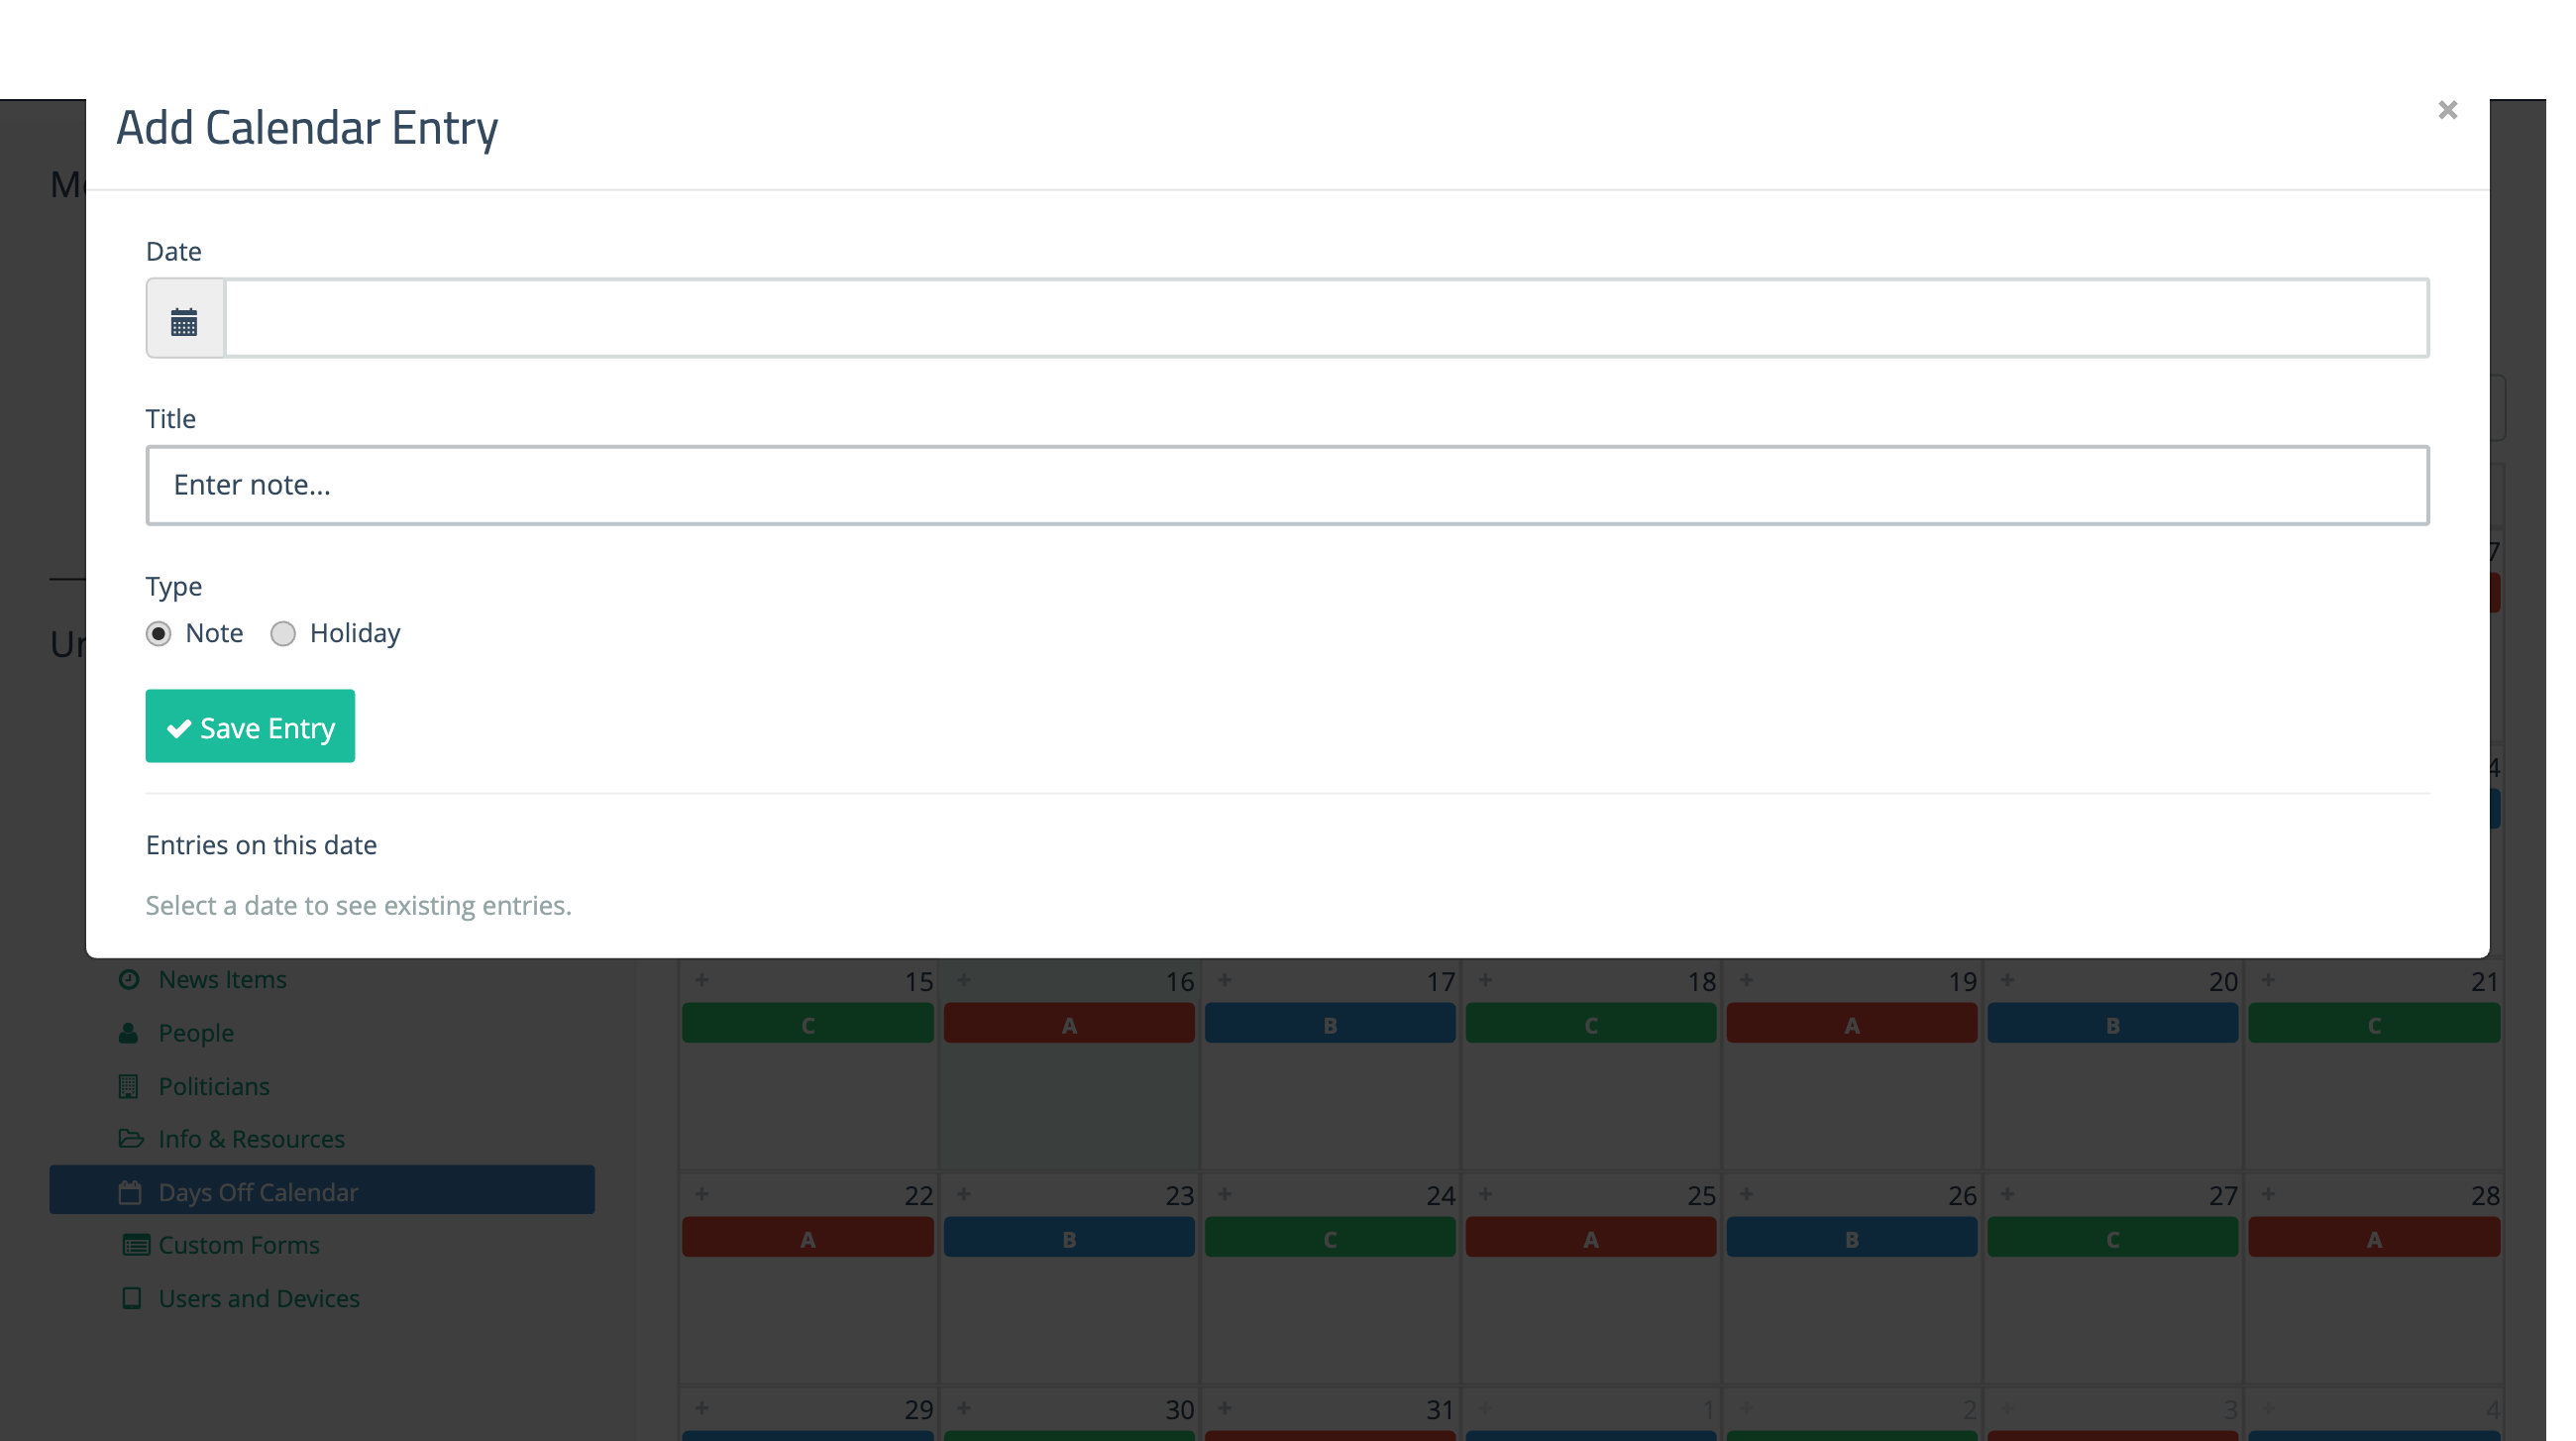
Editing and Deleting Entries
To edit or delete an existing entry, click on it on the calendar or open the Add Note / Holiday dialog and select the same date. Existing entries for that date will appear at the bottom of the dialog with edit and delete options.